Follow Me On Social Media!
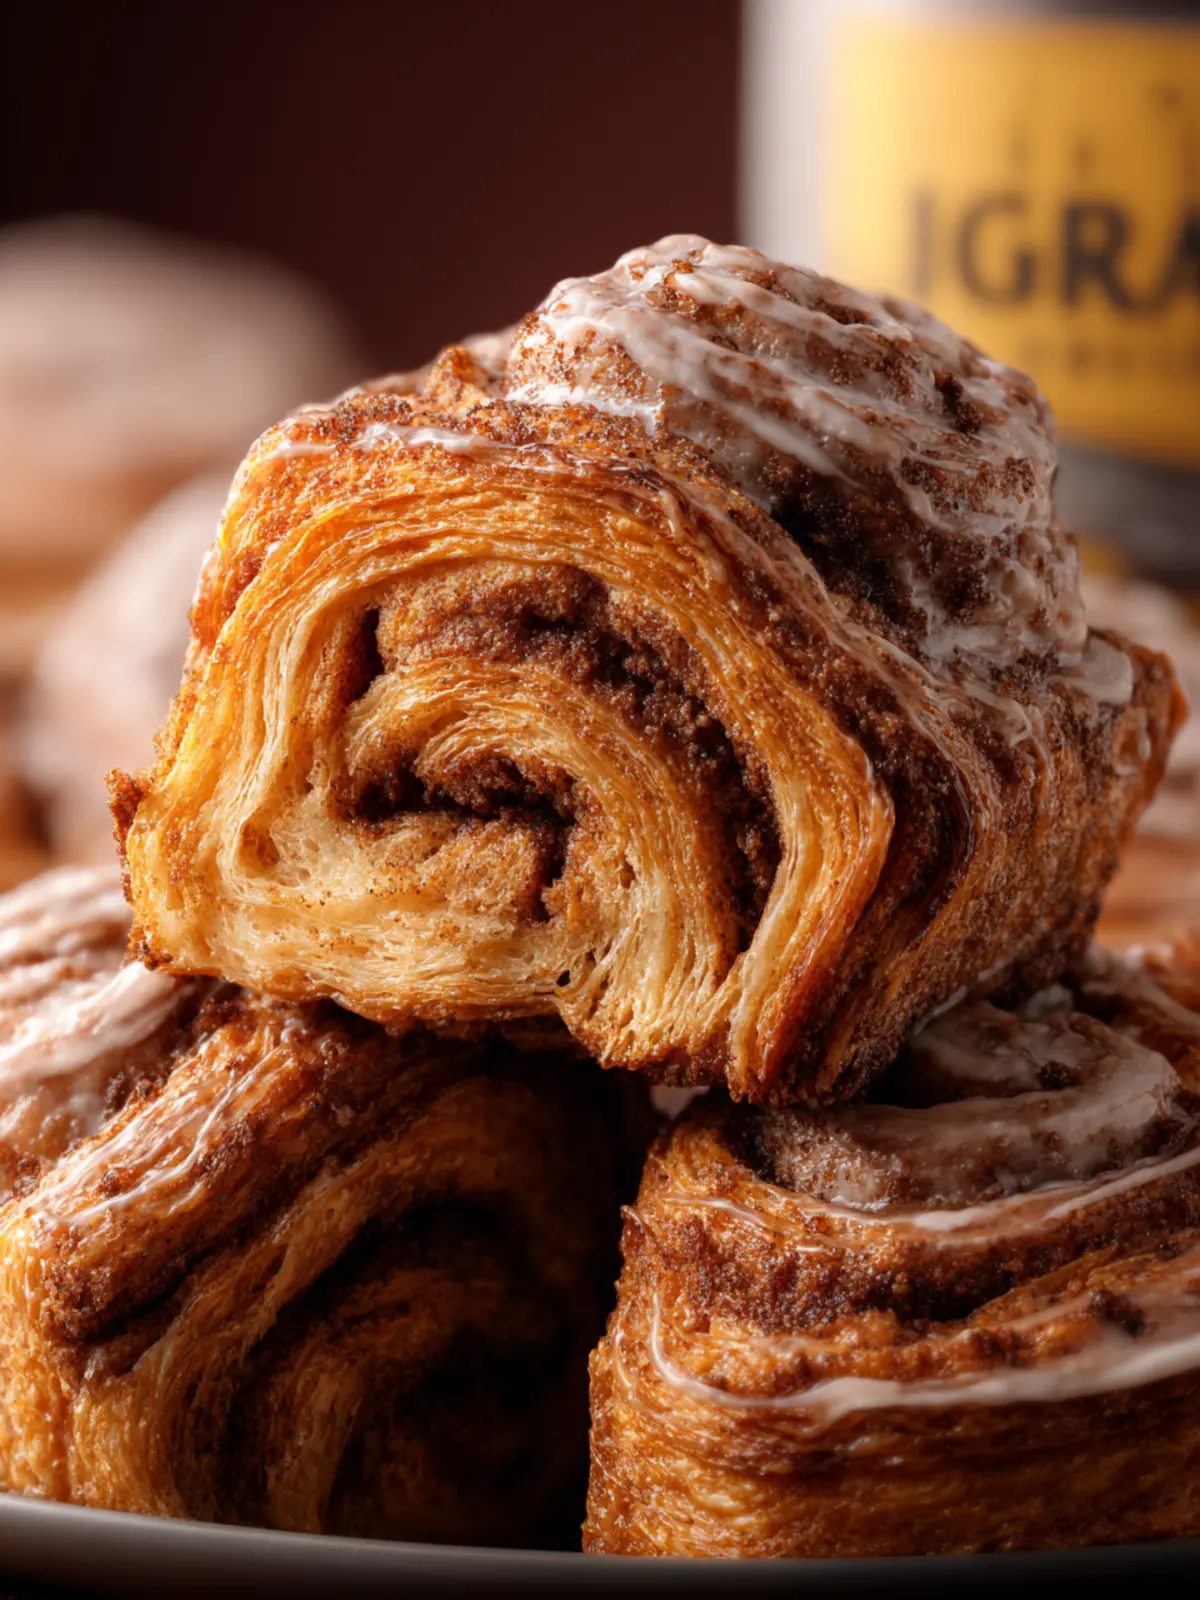
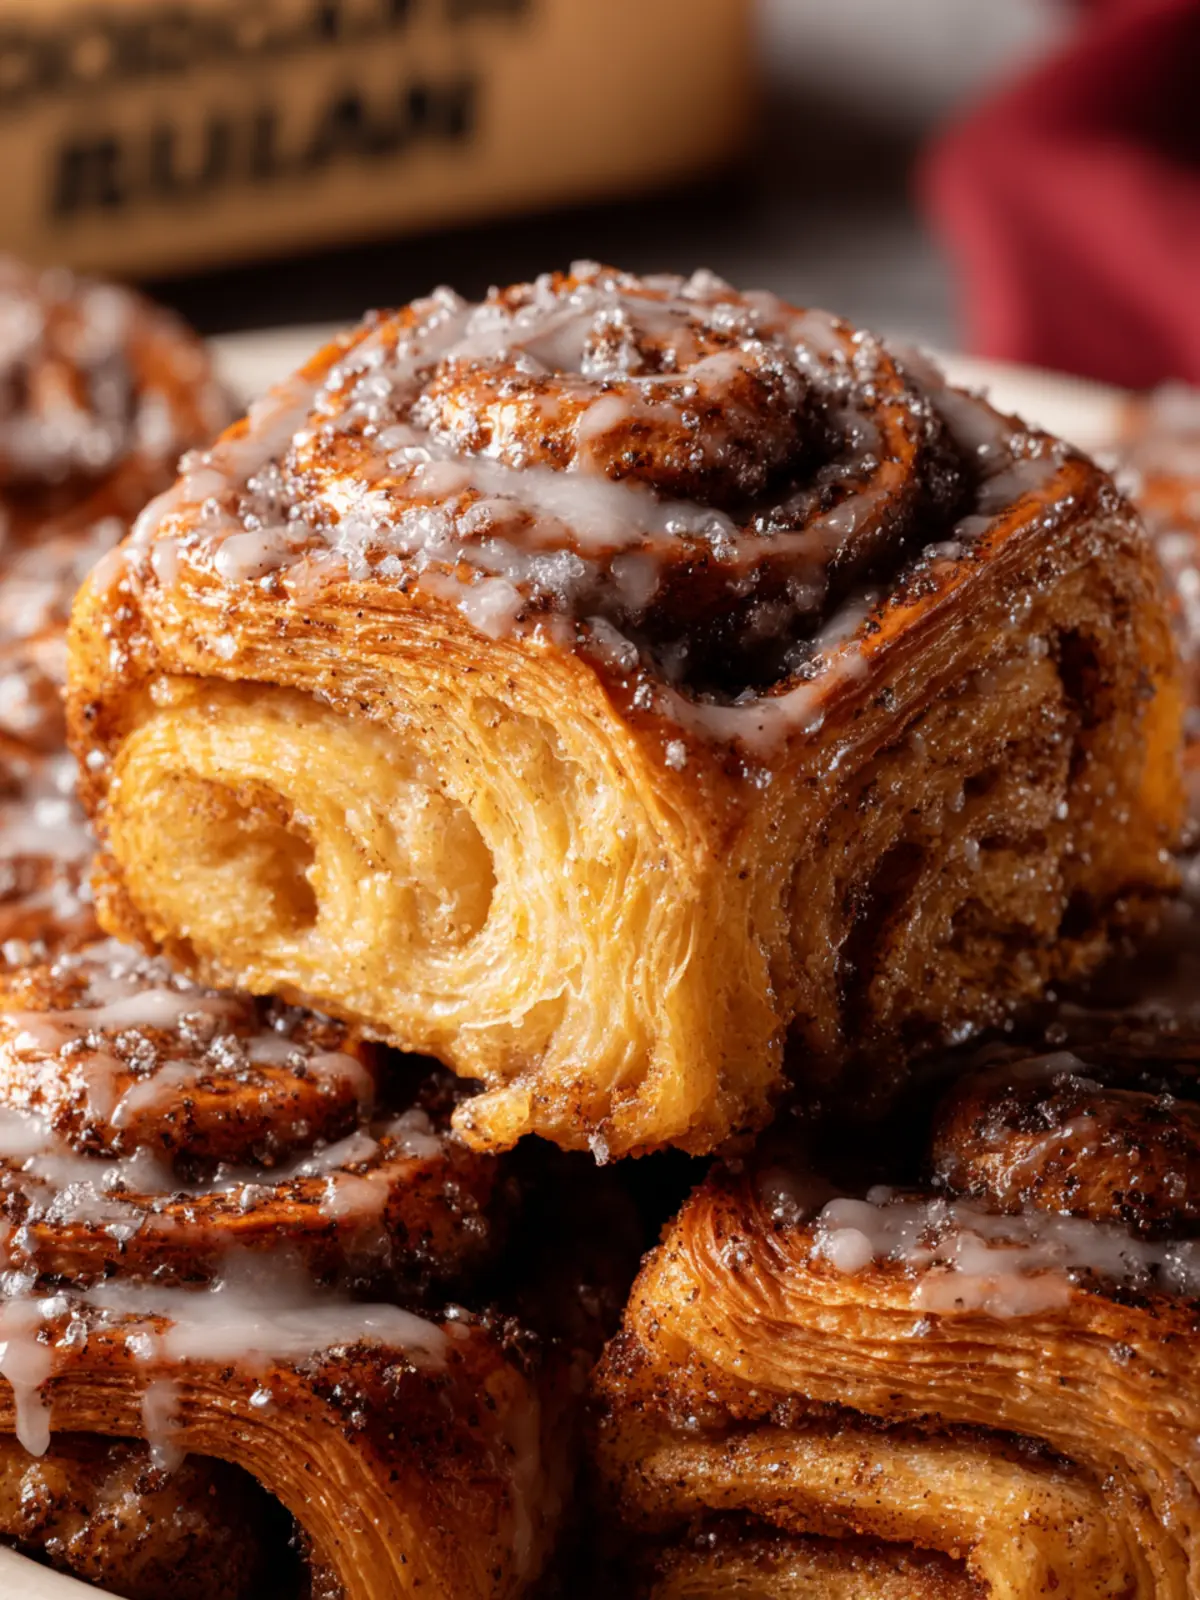
Croissant Cinnamon Rolls: Irresistibly Flaky and Decadent Delight
Introduction to Croissant Cinnamon Rolls (Flaky Laminated Cinnamon Rolls)
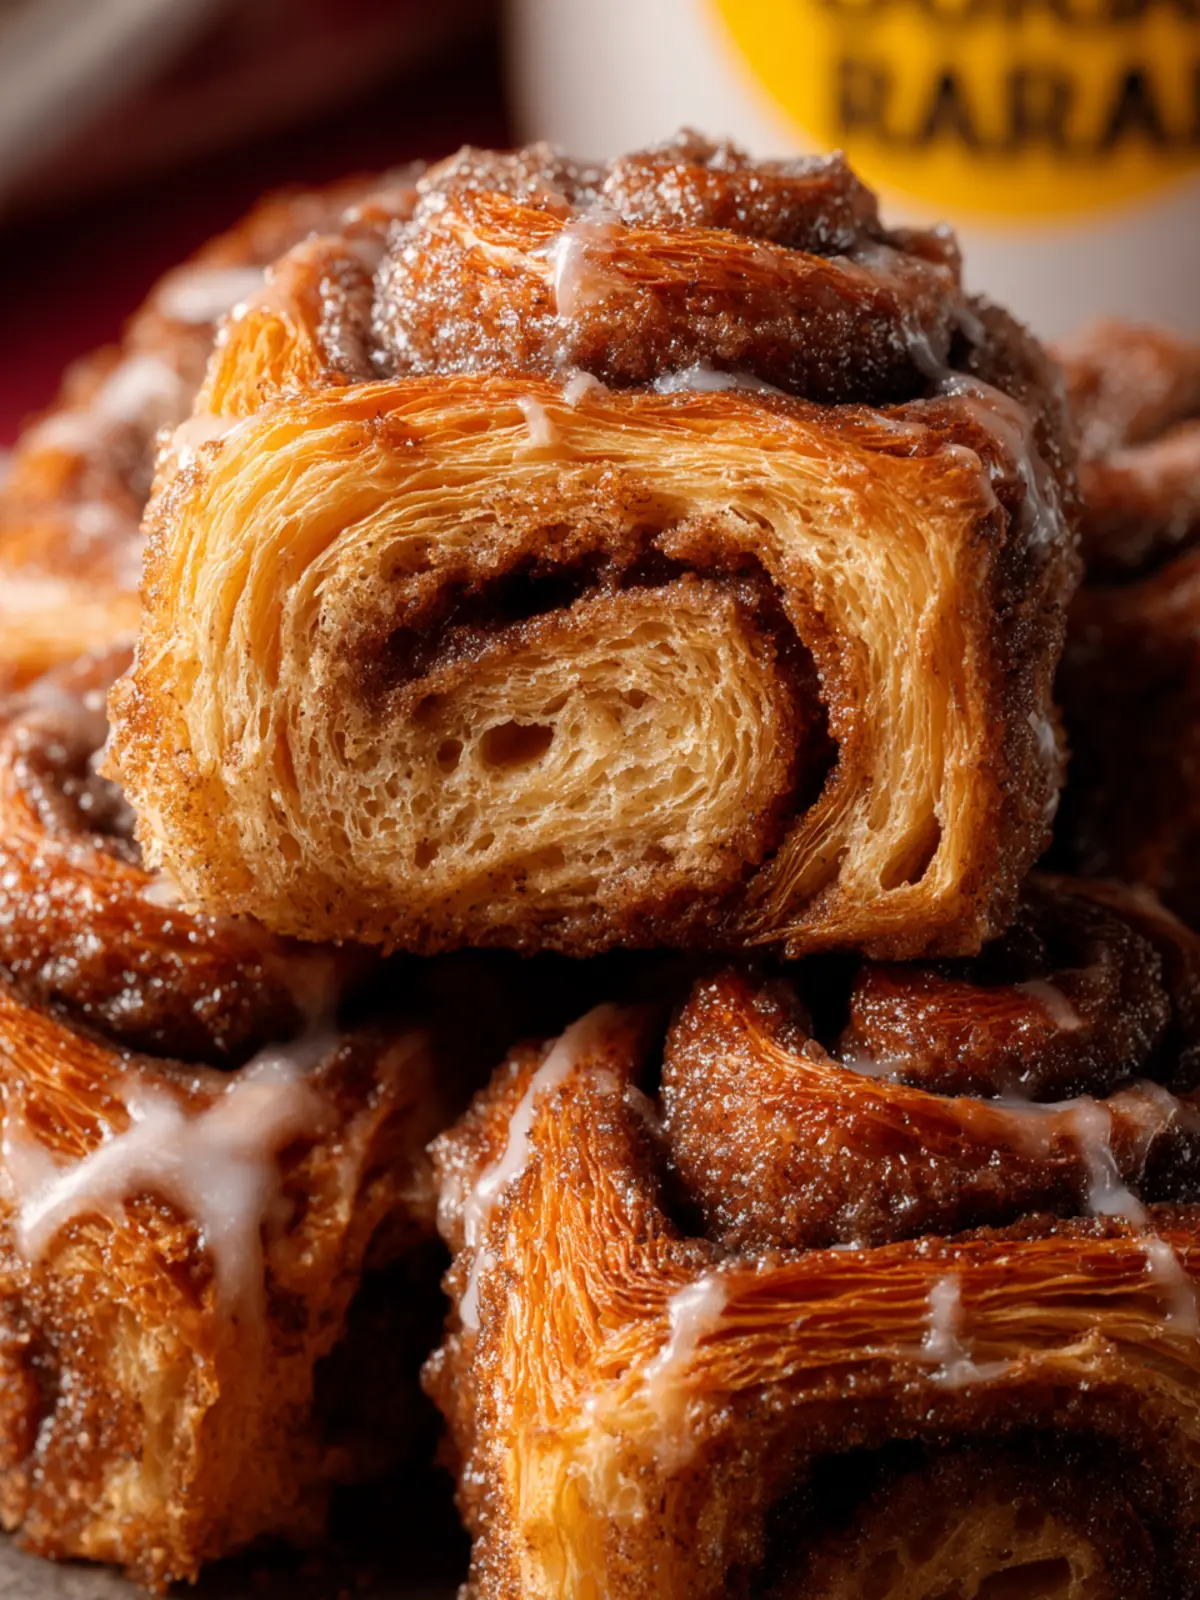
Imagine waking up to the smell of freshly baked croissant cinnamon rolls, their flaky layers beckoning you to indulge in a delightful breakfast or afternoon treat. The combination of buttery, flaky pastry and the sweet, spicy aroma of cinnamon creates an irresistible allure that’s hard to resist. As the warm, gooey rolls come out of the oven, the crispy exterior gives way to a soft and tender interior, inviting you to take that first bite.
The journey of crafting croissant cinnamon rolls is an art that marries the techniques of traditional croissant-making with the beloved essence of cinnamon rolls. The dough is meticulously layered with butter, creating those iconic flaky layers that separate beautifully when baked. Each roll is enveloped in a mixture of cinnamon, sugar, and often a dash of nutmeg, filling your kitchen with warmth and nostalgia.
What Makes Croissant Cinnamon Rolls Irresistible?
The croissant cinnamon rolls are not just visually pleasing; each bite is a symphony of texture and flavor. Here’s why they’re a must-try:
-
Flaky Layers: The lamination process—where dough and butter are folded multiple times—creates those delicious, flaky layers that are the hallmark of a good croissant. This technique gives the rolls their signature airy bite.
-
Sweet and Spicy Filling: The blend of cinnamon and sugar not only adds sweetness but also brings warmth and spice. This comforting flavor combination makes every roll feel like a hug for your taste buds.
-
Versatility: Whether enjoyed plain, drizzled with icing, or topped with nuts and dried fruits, croissant cinnamon rolls offer endless variations to suit any palate.
-
Perfect for Sharing: These rolls are perfect for gatherings or weekend brunches, bringing people together to share in the joy of homemade baked goods.
Baking croissant cinnamon rolls may take a bit of time and patience, but the end result is a delightful treat that brings joy to your table. So roll up your sleeves, grab your aprons, and let’s dive into the world of flaky, delicious cinnamon rolls!
Key Ingredients for Croissant Cinnamon Rolls
Croissant cinnamon rolls take the classic pastry to new heights, combining the flaky layers of a croissant with the cozy sweetness of cinnamon rolls. To achieve that perfect golden-brown exterior and tender interior, the right ingredients are essential.
-
Dough: Start with quality all-purpose flour. This forms the backbone of your rolls, giving them structure. You could use bread flour for an even chewier roll, but all-purpose flour will still yield delightful results.
-
Unsalted Butter: Using cold, high-quality unsalted butter is key for creating those flaky layers. You’ll want to cut and fold it into your dough to help develop those signature layers.
-
Milk: Whole milk adds richness and moisture to the dough. If you’re looking for a lighter option, almond or oat milk works but can slightly alter the taste and texture.
-
Sugar: A blend of granulated sugar for sweetness and brown sugar for richness enhances the filling. The brown sugar caramelizes while baking, creating that irresistible gooey center.
-
Cinnamon: Freshly ground cinnamon brings warmth and depth. It’s the star of the filling, and using quality, aromatic cinnamon can elevate your rolls to a whole new level.
-
Yeast: Instant yeast works best for this recipe, as it provides a faster rise without the need for proofing, making the process smoother and more efficient.
-
Eggs: Adding eggs enriches the dough and ensures a tender texture. They help bind everything together, making your croissant cinnamon rolls deliciously soft.
With these ingredients on hand, you’re ready to create a batch of irresistible croissant cinnamon rolls that will impress everyone around you!
Why You’ll Love Croissant Cinnamon Rolls
Imagine sinking your teeth into a warm, buttery croissant cinnamon roll, its flaky layers revealing a sweet, aromatic filling. The first bite is nothing short of heavenly, blending the crispiness of a croissant with the gooey indulgence of classic cinnamon rolls. This delightful treat can elevate any morning routine or afternoon pick-me-up, whisking you away to a cozy café atmosphere right in your kitchen.
What makes these croissant cinnamon rolls truly special?
-
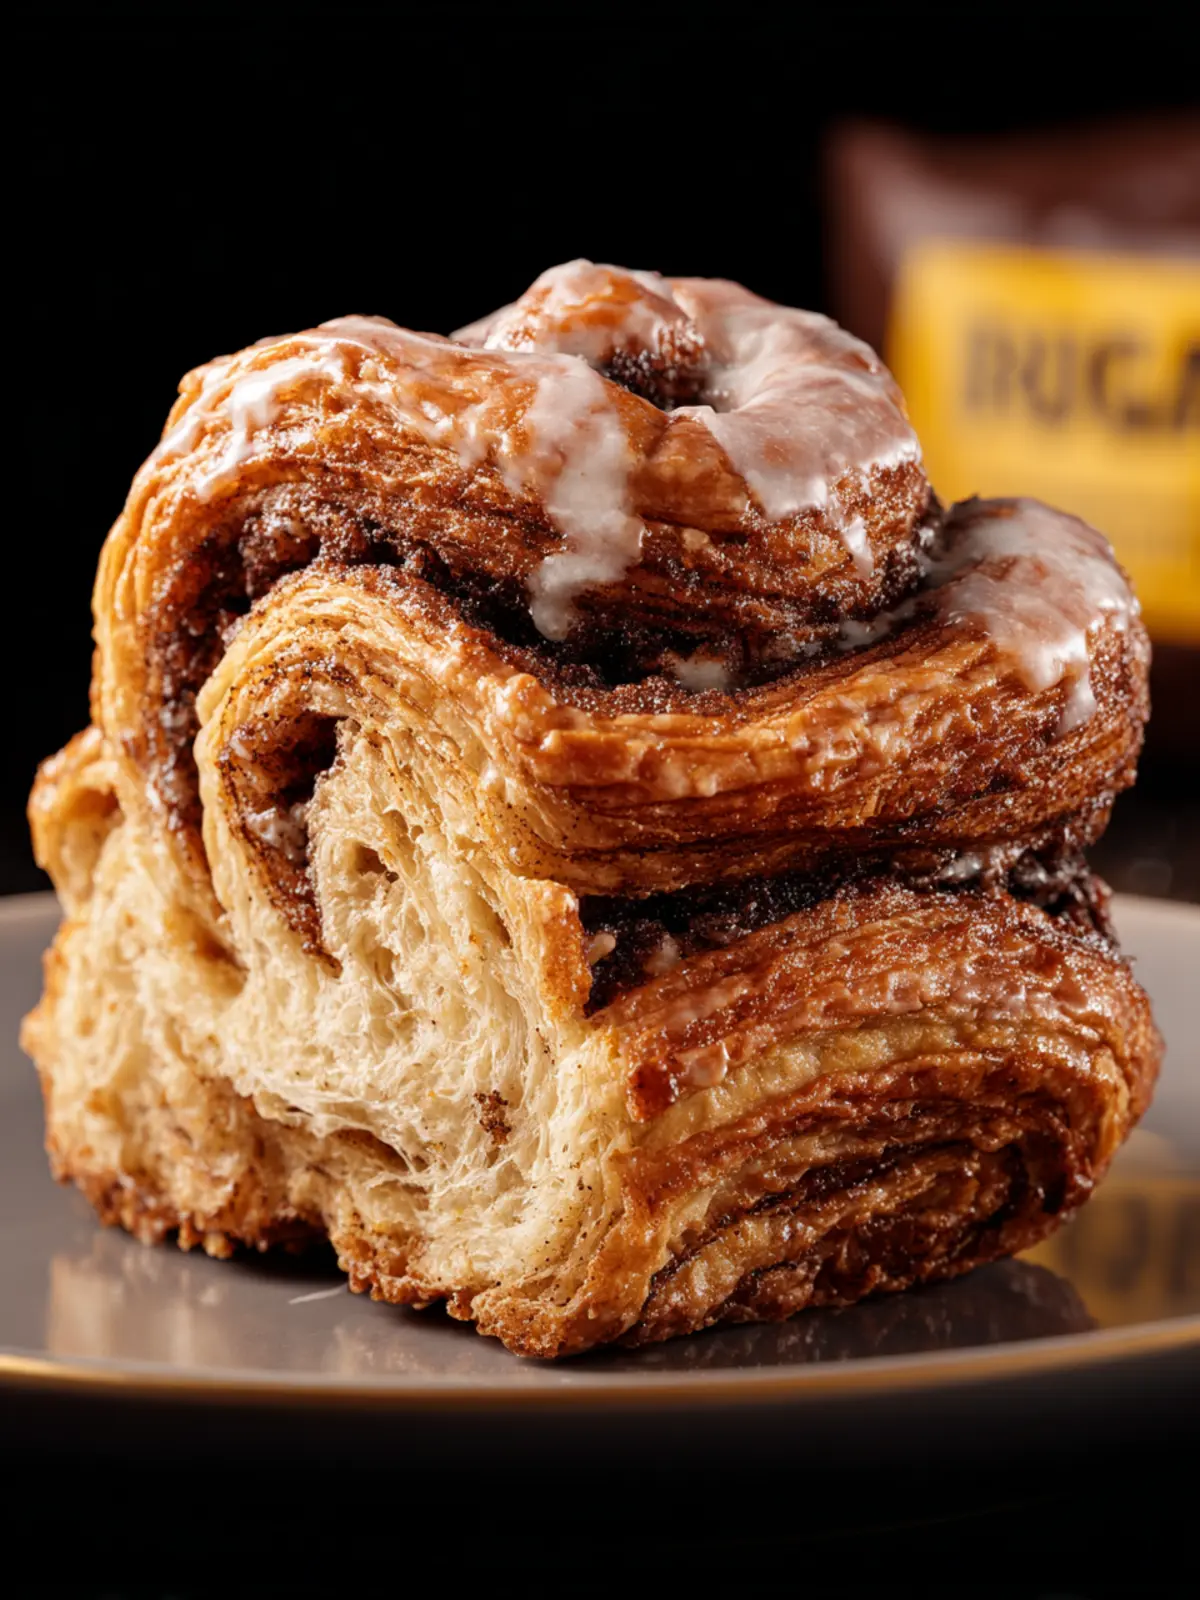
Flaky Perfection: Thanks to the laminated dough, these rolls are impossibly flaky. The layers create a light texture that melts in your mouth, contrasting beautifully with the rich filling.
-
Irresistible Aroma: As they bake, the scent of warm cinnamon and vanilla wafts through your home, creating a welcoming atmosphere that draws everyone in.
-
Customizable Options: You can easily make these rolls your own by adding nuts, dried fruits, or even a splash of orange zest. The possibilities are endless!
Each bite of the croissant cinnamon rolls will remind you of the joy of home baking, evoking comfort and happiness. Plus, they’re elegant enough to impress any guest! Just imagine the smiles when you serve these at your next gathering.
So, are you ready to indulge in a croissant cinnamon roll adventure? Let’s get baking!
Tips for Making Perfect Croissant Cinnamon Rolls
Creating mouthwatering croissant cinnamon rolls at home is a delightful adventure, but a few simple tips can elevate your baking game to the next level.
Embrace the Lamination Technique
The secret behind the flaky layers in croissant cinnamon rolls lies in the lamination process. Make sure to properly fold and roll out your dough to form multiple layers of dough and butter. A light touch is key; don’t press too hard, as you want to preserve the air pockets that will give your rolls their flakiness.
Chill, Don’t Rush
Temperature control is crucial. Keep your dough and butter cold, especially during rolling. If at any point it becomes too soft, pop it back in the fridge for 10 to 15 minutes. This helps maintain the integrity of the layers and ensures that your rolls are perfectly flaky.
The Right Fillings Matter
Use a high-quality cinnamon for the filling. A blend of brown sugar and a hint of vanilla enhances the overall flavor. Don’t be tempted to skip the salt—just a pinch brings out all those yummy flavors.
Allow Proper Proofing
Make sure to allow your croissant cinnamon rolls to proof adequately. This step develops the dough’s structure, leading to a light, airy texture. A good rule is to let them rise for at least 1-2 hours at room temperature or until they’ve doubled in size.
These tips, combined with your love for baking, will ensure that every batch of your croissant cinnamon rolls turns out perfectly golden, flaky, and irresistibly delicious. Enjoy the process!
Time Details for Croissant Cinnamon Rolls
Preparation Time
Getting started on these croissant cinnamon rolls requires some patience and care, but it’s well worth it. Expect about 30 to 45 minutes to gather your ingredients and roll out the dough to the perfect consistency. Remember, this is all about the layers!
Proofing Time
Once the dough is shaped and filled, let it proof for about 1 to 1.5 hours. This step is key, as the rolls will rise beautifully, creating that perfect flaky texture you crave.
Baking Time
Baking your croissant cinnamon rolls will take about 25 to 30 minutes. Keep an eye on them to ensure they achieve that golden-brown finish.
Total Time
From start to finish, you’re looking at around 2.5 to 3 hours for these delightful rolls, but trust me, every minute is a step toward cinnamon-scented bliss!
Nutritional Information for Croissant Cinnamon Rolls
Creating croissant cinnamon rolls involves indulgence, and with that, it’s helpful to know their iconic flavors come with a nutritional profile. Here’s a quick breakdown:
Calories
Each croissant cinnamon roll contains approximately 300-350 calories. This varies based on the size and ingredients, but it’s an enjoyable treat that’s still manageable within a balanced diet.
Protein
In your croissant cinnamon rolls, you’ll find about 4-5 grams of protein per roll. While not a primary source of protein, they add a nice touch to your breakfast or dessert experience.
Sugar
These delicious rolls boast around 10-12 grams of sugar each, mainly from cinnamon filling and glaze. It’s important to savor them mindfully, as this adds to the delightful sweetness!
With this nutritional information, you can enjoy your croissant cinnamon rolls knowing just what you’re indulging in!
FAQs about Croissant Cinnamon Rolls
Creating delightful croissant cinnamon rolls at home can be a rewarding culinary adventure, but you might have a few questions about the process. Let’s dive into some common inquiries to set you up for success!
Can I make these rolls ahead of time?
Absolutely! You can prepare your croissant cinnamon rolls in advance. Make the dough, let it rise, and then shape the rolls. Instead of baking them, cover them tightly with plastic wrap and refrigerate overnight. In the morning, simply let them come to room temperature while your oven preheats, and then follow the baking instructions. This way, you can enjoy fresh rolls with minimal morning effort.
What’s the best way to store leftover croissant cinnamon rolls?
If you find yourself with leftover croissant cinnamon rolls, don’t worry! To store them, wrap the rolls tightly in plastic wrap or aluminum foil, or place them in an airtight container. They can stay fresh at room temperature for up to two days. If you want to prolong their life a bit more, consider refrigerating them, but be prepared to warm them up a touch to regain that lovely flaky texture.
Can I freeze croissant cinnamon rolls?
Yes, freezing is a fantastic option! You can freeze either unbaked or baked croissant cinnamon rolls. For unbaked ones, assemble and chill them, then freeze individually on a baking sheet before transferring to a freezer bag. For baked rolls, once cooled completely, wrap them tightly and store in the freezer. When you’re ready to enjoy them, simply reheat in a warm oven or microwave. You’ll be amazed at how well they hold up!
Conclusion on Croissant Cinnamon Rolls
In the realm of pastries, croissant cinnamon rolls are truly a delightful fusion that captures the richness of flaky dough with the comforting warmth of cinnamon. As you pull apart that soft, buttery layer, you’ll find an irresistible swirl that transports your taste buds to a cozy café experience. Whether enjoyed fresh out of the oven or with a cup of coffee for breakfast, these rolls are bound to impress. The process may seem daunting, but the reward is well worth it—perfect for gathering friends or indulging solo. So, embrace your inner baker and create something extraordinary!
Print
Cinnamon Rolls
- Total Time: 1 hour 30 minutes
- Yield: 8 rolls 1x
Description
Delicious homemade cinnamon rolls that are fluffy and flavorful, perfect for breakfast or dessert.
Ingredients
Scale
- 400 g all-purpose flour (Read notes)
- 100 g bread flour
- 60 g granulated sugar
- 10 g fine sea salt
- 9 g instant yeast
- 310 g whole milk (cold)
- 30 g unsalted butter (very soft)
- 283 g Plugrà unsalted butter (cold but pliable, cut into slices)
- 160 g light brown sugar
- 12 g ground cinnamon
- 8 g cornstarch or all-purpose flour
- Pinch of salt
- 20 g unsalted butter (melted for brushing)
- 55 g cream cheese (very soft)
- 180 g powdered sugar
- 20 g milk or cream (adjust for consistency)
- 1 teaspoon vanilla extract or vanilla bean paste
- Pinch of salt
Instructions
- In the bowl of a stand mixer, whisk together the all-purpose flour, bread flour, sugar, salt, and yeast.
- Add the cold milk and soft butter.
- Mix on low speed for 3–4 minutes until a shaggy dough forms.
- Increase to medium-low speed and mix another 3–4 minutes until smooth and elastic. The dough should be soft but not sticky.
- Shape into a rectangle about 1 inch thick, wrap tightly, and refrigerate for 30–45 minutes.
- On a sheet of parchment paper, draw a 7 × 8-inch rectangle using a ruler and marker. Flip the parchment over so the ink side is facing down (this prevents ink transfer).
- Put the cold but pliable butter slices in the center of the drawn rectangle on the clean side of the parchment. It’s okay if it doesn’t fill the shape yet. Place a second piece of parchment on top. Using a rolling pin, gently pound the butter to start flattening it. This softens it evenly without warming it too much.
- After pounding, begin rolling the butter outward toward the corners of the rectangle, using the drawn lines as your guide. Keep the edges as straight as possible.
- If needed, lift the parchment and use a bench scraper or your hands to press and straighten the sides so you end up with a neat, even 7 × 8-inch rectangle of consistent thickness.
- Refrigerate the butter block until it is cold but still bendable. It should feel firm, but if you flex it gently, it shouldn’t crack. If it’s rock hard, let it sit at room temperature for 3–5 minutes before laminating.
- Roll the chilled dough on a lightly floured surface into an 8 × 16-inch rectangle. Keep the edges straight and thickness even. If the dough resists or shrinks back, let it rest 5–10 minutes before continuing.
- Place the butter block in the center of the dough so it covers half the rectangle. Fold the dough over the butter to fully enclose it, aligning edges carefully. Pinch the seams closed and press gently to seal so no butter is exposed.
- Fold into thirds like a letter. Fold the top third down, then fold the bottom third up over it. This completes the first fold. Wrap tightly in plastic wrap and refrigerate for 30 minutes to firm the butter and relax the gluten.
- Rotate the dough 90 degrees (so the folded edge is on your left like a book spine). Roll again into a 10 × 20-inch rectangle, keeping the thickness even and edges straight. If the dough springs back, chill 10–15 minutes before rolling further.
- Fold into thirds again. Wrap tightly and refrigerate for 30–40 minutes. The dough should feel cool and slightly firm before continuing.
- Roll slightly thicker into an 8 × 15-inch rectangle for the final fold. Handle gently and avoid excessive pressure to preserve the layers.
- Fold into thirds one last time. Wrap tightly and refrigerate for 45–60 minutes before rolling out to add the filling and shape the cinnamon rolls.
- In a medium bowl, mix the brown sugar, cinnamon, cornstarch (or flour), and a pinch of salt until evenly combined. Set aside.
- Roll out the dough on a lightly floured surface into a 14 × 16-inch rectangle, about ¼-inch thick. Try to keep the thickness even so the rolls bake uniformly.
- Lightly brush the surface of the dough with melted butter (optional but recommended for richer flavor and better filling adhesion).
- Sprinkle the cinnamon sugar mixture evenly over the dough, leaving about ½ inch bare along one long edge to help the seam seal. Lightly press the filling into the dough with your hands or a rolling pin (very gently) so it adheres to the melted butter and doesn’t spill out as much while rolling and slicing.
- Starting from the longer side, roll the dough up into a tight log. Roll steadily but gently, tight enough to create defined swirls, but not so tight that the filling squeezes out.
- Finish with the seam on the bottom of the log and gently press to seal. Keeping the seam underneath helps prevent the rolls from unrolling during proofing and baking.
- Trim a thin slice off each end to clean up the edges, then cut into 8 even rolls. Use a very sharp knife and gently slice your rolls. You can use a pizza cutter to cut the log into sections first, but it can be messier because some filling may slide out.
- Arrange rolls in a parchment-lined 9 × 13-inch pan, spaced evenly. Place each roll so the loose end (“tail”) is pointing towards another roll (not sticking outward). This helps keep the spiral tight so they don’t open up too much while proofing/baking.
- Cover loosely and proof until noticeably puffy and the rolls are just touching or nearly touching a cool kitchen (around 70°F): about 1½–2 hours. In a warm kitchen, proofing may be faster; they should look lighter, inflated, and jiggly when you gently shake the pan.
- Once proofed, place the pan in the refrigerator for 15–20 minutes while the oven preheats. This firms the butter layers again and helps the rolls bake up flakier with cleaner layers.
- Preheat oven to 400°F. Bake for 10 minutes, then reduce the oven temperature to 375°F and bake 15–20 minutes more, until deeply golden and baked through.
- Let the rolls cool in the pan for 10 minutes before glazing so the glaze melts slightly but doesn’t disappear completely.
- Beat the softened cream cheese until completely smooth. Add powdered sugar, vanilla, and a pinch of salt and mix until smooth.
- Whisk in milk or cream a little at a time until the glaze is thin and pourable (a thin glaze keeps the flaky layers visible).
- Drizzle glaze over warm rolls and serve immediately.
Notes
- Ensure the butter is pliable but not too soft when adding to the dough.
- For best results, use room temperature ingredients.
- Consider using a kitchen scale for precise measurements.
- Prep Time: 1 hour
- Cook Time: 30 minutes
- Category: Breakfast
- Method: Baking
- Cuisine: American
Nutrition
- Serving Size: 1 roll
- Calories: 300
- Sugar: 15 g
- Sodium: 200 mg
- Fat: 15 g
- Saturated Fat: 9 g
- Unsaturated Fat: 4 g
- Trans Fat: 0 g
- Carbohydrates: 40 g
- Fiber: 1 g
- Protein: 5 g
- Cholesterol: 30 mg