Follow Me On Social Media!
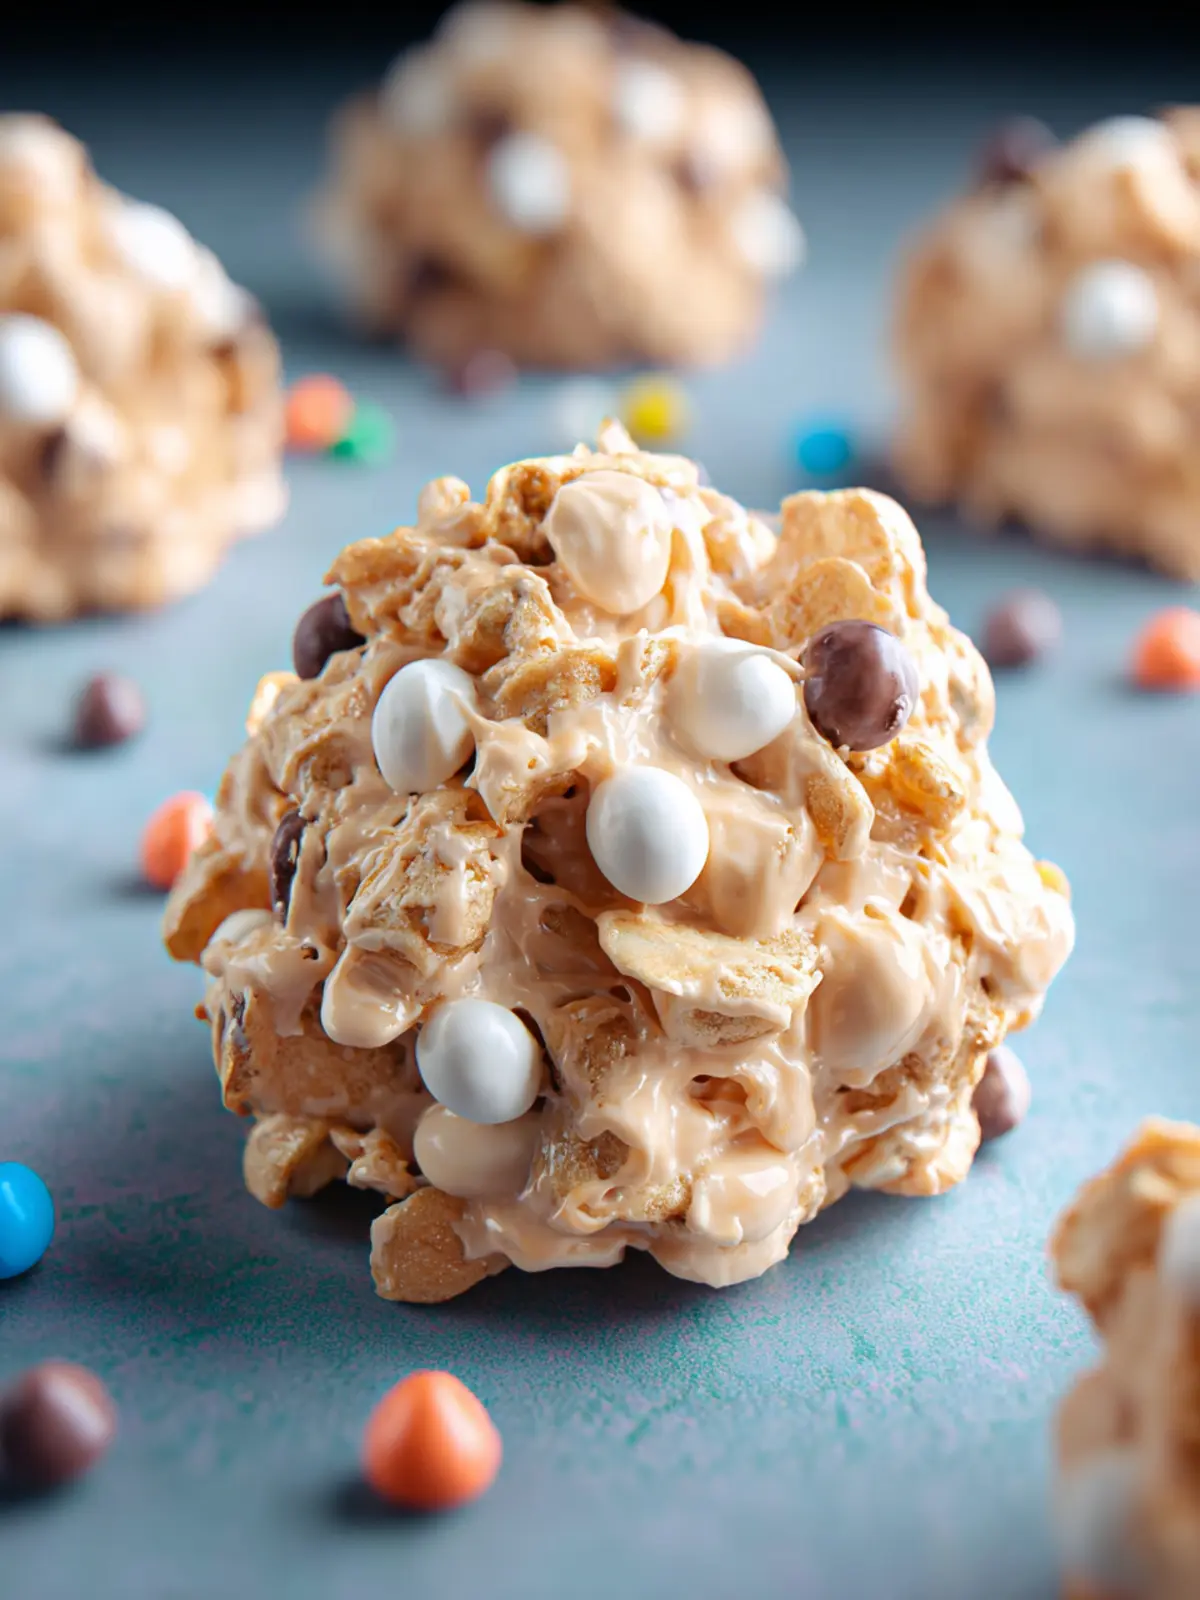
No-Bake Avalanche Cookies: Irresistibly Sweet & Nutty Delights
Introduction to No-Bake Avalanche Cookies with White Chocolate & Peanut Butter
Imagine a cookie that merges the delight of white chocolate and the creaminess of peanut butter—without the need for an oven. No-bake avalanche cookies are a heavenly treat that caters perfectly to our fast-paced lives while still satisfying that sweet tooth. These delightful morsels have become a staple for busy professionals who crave something delicious but don’t always have the time to spend hours in the kitchen.
The beauty of no-bake avalanche cookies lies not just in their simplicity but also in their versatility. With just a handful of ingredients like creamy peanut butter, crispy rice cereal, and white chocolate chips, you can whip up a batch in under 30 minutes! They can be made as a quick afternoon pick-me-up, a dessert for last-minute gatherings, or even a special treat for yourself after a long day at work. No precise measurements for oven temperatures or baking times to worry about means you can enjoy the process without the stress!
Why these cookies are a game-changer for busy professionals
For young professionals juggling meetings, deadlines, and social commitments, spending hours baking simply isn’t viable. These no-bake avalanche cookies are the quick fix you need. Here’s why:
- Time-efficient: You can prepare, chill, and devour these cookies in the time it takes to brew your coffee.
- Foolproof: Even if baking isn’t your forte, these cookies require minimal skill and maximum flavor.
- Customizable: Feel free to switch out the cereals or add fun mix-ins like nuts, dried fruit, or even a sprinkle of sea salt for that extra flavor boost.
- Storage-friendly: They can be made ahead of time and stored in the fridge for a quick grab-and-go snack throughout the week.
The next time you find yourself wishing for a sweet treat but feeling too swamped, these no-bake avalanche cookies will revolutionize your snack game—easily elevating any afternoon from mundane to marvelous!

Key Ingredients for No-Bake Avalanche Cookies with White Chocolate & Peanut Butter
Creating no-bake avalanche cookies is a delightful endeavor that combines the richness of peanut butter with the sweetness of white chocolate. Let’s dive into the key ingredients that will make these cookies a hit at any gathering.
-
White Chocolate: This is the star of the show, providing a creamy sweetness that beautifully balances the other flavors. Opt for high-quality white chocolate chips for the best results, ensuring they melt smoothly and create that beloved gooey texture.
-
Peanut Butter: Choose a natural, creamy peanut butter for a luscious consistency. Its nutty taste blends perfectly with the white chocolate, making every bite melt in your mouth. If you’re feeling adventurous, try a crunchy variety for some added texture!
-
Rice Cereal: This ingredient gives your cookies that signature crunch. Consider using puffed rice cereal as it absorbs the melting chocolate without becoming soggy, ensuring every mouthful is a delightful mix of chewy and crunchy.
-
Butter: Melted butter adds richness and helps bind the ingredients together. It’s essential for achieving that perfect, indulgent cookie texture.
-
Vanilla Extract: A splash of vanilla elevates the flavor profile, harmonizing with the peanut butter and chocolate to create a symphony of deliciousness.
With these ingredients, you’re just a step away from creating irresistible no-bake avalanche cookies that your friends and family will cherish!
Why You’ll Love No-Bake Avalanche Cookies
Sweet, salty, and simply irresistible!
Imagine biting into a perfectly crafted treat that hits all the right notes—a delightful blend of sweetness and saltiness that dances on your taste buds. That’s exactly what you get with no-bake avalanche cookies. These easy-to-make cookies combine rich, velvety white chocolate and creamy peanut butter, resulting in a flavor explosion that makes each bite addictive. What’s better? You don’t even need to turn on the oven!
Whether you’re looking for a quick snack to tide you over between meetings or a sweet treat to share at your next gathering, these cookies fit the bill perfectly. They come together in mere minutes, making them ideal for busy young professionals. Just mix, chill, and indulge—it’s that simple!
What I love most about no-bake avalanche cookies is their versatility. You can easily customize the toppings with your favorite nuts or sprinkles, making them not only delicious but also visually appealing. Plus, with a blend of textures—from the smooth chocolate to the crunchy cereal—these cookies provide a unique eating experience. Once you try them, you’ll wonder how you ever lived without this treat in your life!

Tips for Making Perfect No-Bake Avalanche Cookies
Creating no-bake avalanche cookies is not just about mixing ingredients; it’s about crafting bites of indulgence that will leave your taste buds dancing. These treats are a delightful marriage of textures and flavors, so here are some essential methods for success to help you achieve cookie perfection.
Essential Methods for Success
-
Use Quality Ingredients: Start with the best chocolate and peanut butter you can find. High-quality white chocolate ensures a rich creaminess, while a natural peanut butter enhances flavor without added sugars.
-
Measure Precisely: Make sure to measure your ingredients accurately. Using a kitchen scale can help with this, especially for oats, chocolate chips, and peanut butter, ensuring consistent cookie texture.
-
Be Patient with Chilling: Allow your no-bake avalanche cookies enough time to chill in the fridge. Proper chilling helps the chocolate set and solidify, giving you that perfect crunch when you bite in.
-
Don’t Rush the Melting Process: When melting white chocolate, do it slowly to prevent burning. A microwave in short bursts or a double boiler works wonders for achieving that silky texture.
-
Experiment with Add-Ins: Feel free to personalize your cookies. Adding a pinch of sea salt can elevate the flavors, or tossing in some crushed pretzels adds a delightful salty crunch.
By following these tips, you’ll be on your way to making the ultimate no-bake avalanche cookies that will impress friends and family alike. Enjoy the delicious journey!
Time Details for No-Bake Avalanche Cookies
Making no-bake avalanche cookies is a delightful venture that doesn’t require a hot oven or extensive prep work. Whether you’re whipping these up for a spontaneous gathering or just to satisfy a sweet tooth, knowing how much time you’ll need can help keep your baking adventure smooth and enjoyable.
Preparation time
Gathering ingredients and mixing everything together takes about 15 minutes. It’s super quick, making this treat perfect for those busy days!
Chilling time
After preparing your cookies, they should chill in the refrigerator for at least 30-60 minutes. This step allows them to set properly so they hold their shape and texture.
Total time
In total, you’ll spend around 45-75 minutes from start to finish. With minimal effort and time, you’ll have delicious no-bake avalanche cookies ready to share (or enjoy all by yourself)!

Nutritional Information for No-Bake Avalanche Cookies
Indulging in no-bake avalanche cookies doesn’t have to sabotage your nutrition goals. Each bite not only satisfies your sweet tooth but also packs a punch in terms of nutritional value. Here’s an easy breakdown of what you can expect:
Calories
One serving of these cookies contains approximately 150 calories. While they are certainly a treat, the energy boost can be a great pick-me-up during your busy day.
Protein
With ingredients like peanut butter included, each cookie offers around 4 grams of protein. This helps keep you feeling fuller for longer, making them excellent for a quick snack.
Sugar Content
While the sweetness is irresistible, each cookie contains about 10 grams of sugar. To balance out the sweetness, consider pairing these with a savory snack or enjoying them as a part of a well-rounded meal.
These no-bake avalanche cookies are a delightful blend of taste and nutrition, perfect for satisfying those afternoon cravings!
FAQs about No-Bake Avalanche Cookies
Making no-bake avalanche cookies can feel like magic—whipping together sweet and salty ingredients without ever turning on the oven. However, it’s only natural to have questions before diving in. Here are some common queries and answers to help you navigate your cookie-making adventure.
Can I substitute ingredients in this recipe?
Absolutely! The beauty of no-bake avalanche cookies lies in their versatility. For instance, if you’re not a fan of peanut butter, almond butter or sunbutter can be excellent alternatives. You can also swap out the white chocolate for milk chocolate if you prefer. For a crunchier texture, try adding chopped nuts or crushed pretzels instead of rice cereal. Just be mindful of any allergies when making substitutions.
How should I store these cookies?
To keep your no-bake avalanche cookies fresh, store them in an airtight container at room temperature. Ideally, they should last for about a week. If you’re concerned about melting, especially in warmer climates, placing them in the fridge will help maintain their shape and texture without compromising the flavor.
Can I freeze No-Bake Avalanche Cookies?
Yes, you can freeze these delicious cookies! Just layer them in a freezer-safe container, separating each layer with parchment paper to prevent sticking. They can last in the freezer for up to two months. When you’re ready to indulge, simply let them thaw in the fridge for a couple of hours. Enjoy your delightful, no-bake treat anytime!
Conclusion on No-Bake Avalanche Cookies with White Chocolate & Peanut Butter
In wrapping up our delicious journey into the world of no-bake avalanche cookies, it’s clear that simplicity can lead to mouthwatering results. These cookies, bursting with the creamy richness of white chocolate and peanut butter, are not just easy to whip up; they’re also perfect for satisfying those sweet cravings or impressing friends at any gathering. The best part? No baking means you can enjoy them right away. So, gather your ingredients and dive into making these delightful treats. Trust me, every bite will make you crave just one more!
Print
Chocolate Peanut Butter Rice Krispies Treats
- Total Time: 30 minutes
- Yield: 20 servings 1x
- Diet: Vegetarian
Description
Deliciously crunchy treats made with white chocolate, peanut butter, and Rice Krispies, topped with mini chocolate chips.
Ingredients
Scale
- 16 ounces white melting chocolate
- ¾ cup creamy peanut butter
- 2 cups Rice Krispies cereal
- 2 cups miniature marshmallows
- 1 cup mini chocolate chips (divided)
Instructions
- Prepare a large cookie sheet by covering it with parchment paper; set aside.
- Melt the white chocolate according to the package instructions.
- In a large bowl, combine the melted white chocolate and creamy peanut butter.
- Stir in the Rice Krispies, mini marshmallows, and ¾ cup of the chocolate chips.
- Scoop the cookies out onto the prepared cookie sheet, then top with the remaining chocolate chips.
- Chill the cookies in the refrigerator until set, about 20 minutes.
Notes
- Make sure the chocolate is fully melted for a smooth mixture.
- These treats are best enjoyed fresh, but can be stored in an airtight container for a few days.
- Prep Time: 10 minutes
- Cook Time: 5 minutes
- Category: Dessert
- Method: No-Bake
- Cuisine: American
Nutrition
- Serving Size: 1 cookie
- Calories: 150
- Sugar: 10g
- Sodium: 50mg
- Fat: 7g
- Saturated Fat: 4g
- Unsaturated Fat: 2g
- Trans Fat: 0g
- Carbohydrates: 20g
- Fiber: 1g
- Protein: 2g
- Cholesterol: 10mg